
The Rise, Fall, and Rebirth of Our Rose Arbor


2001 – First attempt at rose garden.

2004 – Foundation Poured
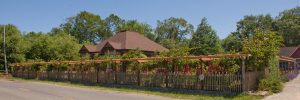
From 2004 to 2010 progress was slow but it was finally completed when the last of the 365 pickets was attached. Before the foundation was poured we dug up the remaining few rose bushes and transplanted them to the backyard. We tried to keep them safe from the deer with netting. Finally with the fence completed, it was time to move them back, and by then we only had one Cécile Brünner and one Gertrude Jeckyl left. The one Cécile Brünner was planted on the right side of the gate, and over the years I took cuttings from it to propagate 16 other bushes. The one on the left side of the gate was donated by Mary Hubner as a very mature bush.
-

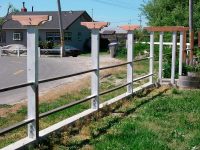
- July 2004 – Fence posts installed
-
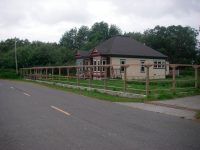
- April 2006 – Still just fence posts
-
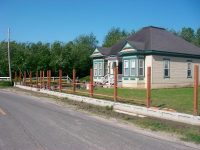
- May 2008 – Rails and cross bars
-
- May 2008 – Primer
-
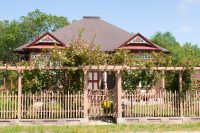
- May 2009 – Gate and top installed
-
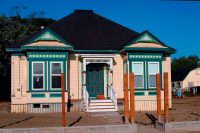
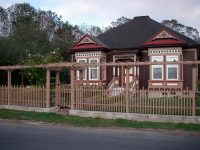
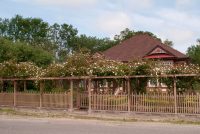
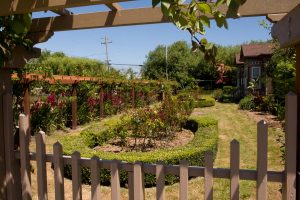
- 2009 – Full View
-
- Feb 2010 – Busy painting house
-
- 2010 – Gate
-
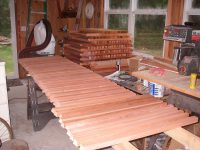
- July 2010 – 365 pickets
-
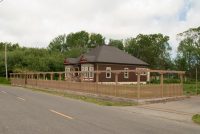
- Sep 2010 – Completed
-
- Oct 2010 – Moving roses back
In 2011, with the garden secured by the arbor in front and deer fencing on the other 3 sides, we started planting the rose garden. Currently we have over 50 roses planted.
-
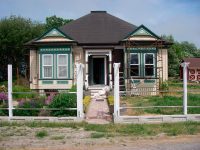
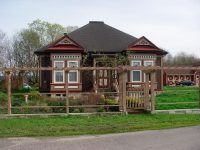
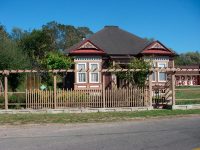
- 2011 – Looking good with house freshly painted
-
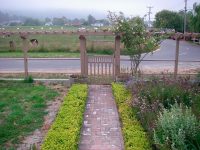
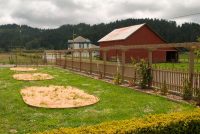
- May 2011 – Beginning to plant the rose border
-
- May 2012 – Rose beds laid out
-
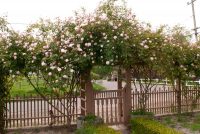
- May 2012 – Gate

2012 Christmas

2012 Flood
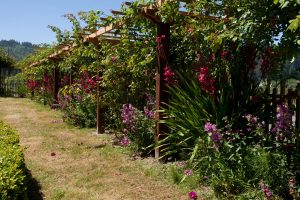
But the next summer I dug out the 6-8″ of silt left by the two floods and started putting the rose garden back together. During the next couple of years the roses really took off, and their display each spring was awesome! Working in the rose garden was a delight as the Cécile Brünner is a very fragrant rose, and with 18 mature bushes we had thousands of them in bloom at the same time.
-
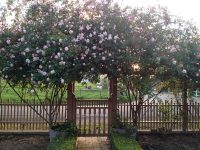
- May 2013
-
- May 2013
-
- May 2013
-
- April 2014
The roses got so vigorous that one violent windstorm in December of 2015 managed to crack six of the 4×6 upright posts. It didn’t help that I had just recently had a bad motorcycle accident and couldn’t get out to prune them or stabilize the fence.

2015 – Wind Damage
Once I had healed I tried fixing the posts in place but the next winter the cracks reappeared so it was evident I was going to have to replace the posts.
Then in 2017, right in the middle of their big spring bloom, Gerry Miller ended his drunk driving rampage through Ferndale by plowing into the fence, taking out the most expensive part of it. He also almost obliterated the one original rose bush that all the others were propagated from, but with a bit of tender care I was able to save it and it’s now doing quite well. As the video from our home security camera show, he also narrowly missed hitting one of our cats who was sitting in the area. The video shows the speed that he hit our fence, and I’m glad we had the concrete foundation there and several big posts or else he probably would have been in our house. I was also thankful he didn’t take out the boxwood hedge because it takes so long to grow one of those back. The video also shows that he was trying to back out of our fence, this after he had already hit two other cars and a fence in town after leaving the Palace. He was arrested on scene and is currently still awaiting trial 14 months later.
Since he already had his license suspended due to a prior DUI, he of course was uninsured. He promised to pay us back for the damage, which of course he has failed to do. Our homeowner’s insurance deductible is $3000 and I estimated he did about $3200 of damage so it wasn’t worth submitting a claim. For over a year we lived with bright orange safety net obstructing our front entryway, while I waited to see if he was going to pay or not, and I really didn’t want to build it a second time so I tried finding a contractor who would be interested in the project.

May 2017 – Gerry Miller’s drunk driving accident

May 2017 – Gerry Miller’s drunk driving accident
Fence guys didn’t want to do it because it wasn’t the type of fence they normally do, and the general contractors I contacted were all too busy to be interested in it. So I started planning how I was going to rebuild it. I decided to do it in stages. First I removed the top part in complete sections, so I could later reuse them elsewhere in the yard. Then starting at one end, I took off each picket section in a unit and replaced the posts with new one. After replacing each post I would then rehang the picket section and go on to the next one.
Taking everything apart I found that the fasteners had severely corroded after just 12 years. So I rebuilt it using all stainless steel fasteners. The screws I bought locally at Valley Lumber, but the large bolts, nuts and washers I ordered online from the Bolt Depot.
One year after it was demolished, I finished the framing for the entryway and rehung the gate. I had to have several of the spindles remade. Dane Cowan made the original ones, but the new ones were made at Mad River Woodworks. Steve Courtemanche made the original gate for me, and salvaging what he could from the debris, he rebuilt it to match the original. The Farm Shop in Ferndale welded on some new brackets as Jerry completely sheered them off so there wasn’t anything left to attach the posts to.
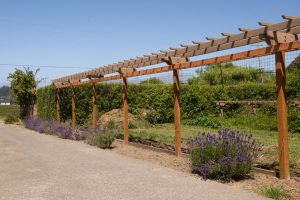
With the design changing to a double column setup, it meant I needed to construct new crossbeams, and redo the entire top part. Here are the steps that I used to fashion the crossbeams, which were made from 4×6 redwood con heart.
- The first step was to drill the curved radius using a 2″ forstner bit. The first time I made them I used the jigsaw to cut that portion, but doing it with a drill was much faster. The investment of the forstner drill was well worth it, they work way better than a hole saw.
Drill 2″ arch
- Trace Template[/caption] As much as possible I tried to use jigs and templates for all the parts I was fashioning, both to speed up production time and to make everything consistent. I traced the pattern of the original tail ends and then cut one. I used the part I cut off as template to mark the others.
Trace Template
- Cut curve with jigsaw[/caption] The curved section was then cut freeform using a portable jig saw. Not the most accurate way to do it as my jig saw doesn’t seem to track curves right. But the later sanding step took care of the problem.
Cut curve with jigsaw
- Another tool purchase that I was happy to get was a dado blade set. Not sure why this wasn’t already in my toolkit, I had thought about getting one many times over the years. I stacked all the blades in the set on my radial arm saw and then then cross cut the square notch.
Cut straight corner
- I used my belt sander to both round the end, and to smooth out the areas cut with the jig saw.
Belt sand curved areas
- The edges were all routed using a 1/2″ rounding bit.
Route edges
- Once I had the 34 crossbeams all made, it was time to start sinking the second column of posts and attaching the crossbeams. Since I was working alone on this project, I made a couple of jigs. The first jig had a forked set of 2x4s that fit on either side of the existing column. This allowed me to position the new column inline with the existing one, get the spacing correct, and have something to clamp to while the concrete set. Then after the concrete was dry I’d turn it over and reclamp it in place to position and support the two crossbeams while I drilled and bolted them to the upright posts. I made a separate jig that allowed me to set the first jig at the right height, drill the hole properly, and position the correct overhang.
Post jigs


With the extra column, the fence is much sturdier, and I can’t budge the posts at all by pushing against them. I think at this point if it blows down again, it means we had a hurricane.
All that’s left to do now is repaint it, which I’m not looking forward to. It means I’m going to have to cut the roses way back again. It was certainly easier building it the first time without those thorny rose bushes in the way. By the time I was done, I looked like I had been in a cat fight, scratches everywhere!
The old pieces from the top of the arbor got recycled into the deer fence that borders the veggie garden. We plan to grow some lighter weight vines on them, probably clematis which should do fine.
-
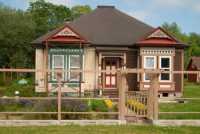
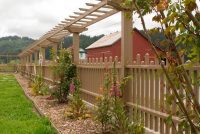
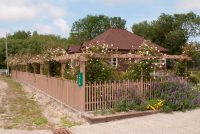
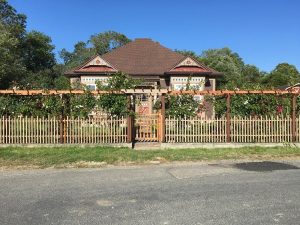
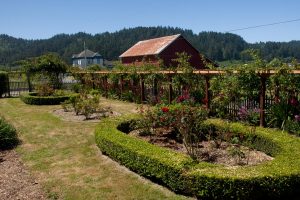
- June 2018 – Rebuild completed
-
- June 2018 – Rebuild completed

-
- June 2018 – Rebuild completed
-
- June 2018 – Rebuild completed
-
- Old arbor top moved to veggie garden
-
- June 2018 – Rebuild completed
-
- June 2018 – Rebuild completed
You should be known as the persistant gardner. Looks very nice.
We are going through the original parts of our home doing restoration & redecorating. I still enjoy the work.